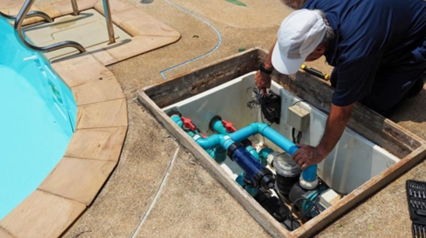
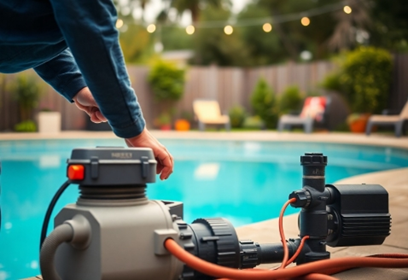
Installing a pool pump is a vital task for ensuring your pool remains clean and the water stays clear. How to install a pool pump may seem complex, but this step-by-step guide will take you through the entire process. A properly installed pool pump ensures optimal circulation, helping to maintain the right chemical balance and water clarity. From gathering the necessary tools to the final test, this guide will provide you with all the details you need for a smooth and successful installation. Let’s walk through the process together, making pool maintenance easier and more efficient for you.

Why Is Proper Pool Pump Installation Important?
Proper installation of your pool pump is essential for ensuring the efficiency and longevity of your pool system. A correctly installed pump optimizes the flow of water, which ensures that your filtration system works effectively, keeping the pool clean and clear. A well-installed pump also reduces the strain on the motor, helping to save energy and lower electricity costs. If installed incorrectly, the pump may experience leaks, excessive noise, or even fail prematurely, leading to expensive repairs. In addition, improper installation can disrupt the chemical balance of the pool, causing cloudy water or algae growth. Proper installation is crucial for the long-term functionality of your pool.
Tools and Materials Needed for Pool Pump Installation
Before starting the installation, gather the necessary tools and materials to ensure the process goes smoothly. You’ll need a screwdriver set, a wrench set, PVC primer and cement, a hacksaw for cutting PVC pipes, and Teflon tape for sealing connections. Additionally, make sure you have PVC pipes and fittings, including unions, as well as the pool pump itself. It’s also essential to have safety gear like gloves and goggles to protect yourself while working. Having all the right materials on hand before you begin will help you avoid interruptions during the installation process, ensuring a more efficient and successful setup.
How to Prepare Your Pool Area for Pump Installation
Preparation is key when installing a pool pump to ensure a smooth and safe process. Start by turning off the electrical supply to avoid accidents. Drain any water from the pool pump area to keep it dry, and clear any debris that may be obstructing your workspace. It’s important to have a clean and accessible area for the installation. Make sure the surface where the pump will be placed is solid, level, and free of any obstructions. Measure the area carefully and plan the layout for optimal placement, considering the proximity to your pool and electrical outlets. A well-prepared site sets the foundation for a successful installation.
Step-by-Step Guide to Installing a Pool Pump
Positioning the Pool Pump
The first step in installing a pool pump is to position it correctly. The pump should be placed on a stable, level platform to minimize vibrations. These vibrations can lead to wear and tear over time and cause the pump to work inefficiently. Ensure the pump is placed as close to the pool as possible for optimal water flow and performance. It's also important to leave enough space around the pump for easy maintenance and servicing. Mark the area where you plan to drill any holes needed for securing the pump to the surface. Proper positioning ensures long-term efficiency and prevents unnecessary strain on the pump.
Connecting the Plumbing
Once the pump is securely positioned, the next step is connecting the plumbing. Using a hacksaw, cut the PVC pipes to the correct lengths, ensuring they will fit perfectly with the pump’s inlet and outlet. Dry-fit the pipes and fittings before applying any adhesive to make sure everything aligns correctly. Apply PVC primer to the joints to prepare them for the cement. Then, apply PVC cement to the joints and quickly assemble the parts to form a secure, leak-free connection. Use Teflon tape on the pipe connections to further ensure a tight seal. A proper plumbing connection is essential for efficient water flow and preventing leaks.
Wiring the Pool Pump
Wiring the pool pump is an important task that requires careful attention to detail. Before starting, make sure the main electrical power is turned off to avoid any accidents. Open the electrical compartment of the pump and follow the manufacturer’s instructions for wiring. Typically, you’ll connect the ground wire to the green terminal and the hot wires to their respective terminals. Secure the wires using cable clamps to prevent them from moving or getting damaged over time. Double-check all connections to ensure they are secure and safe. Proper wiring ensures the pump operates safely and efficiently, preventing electrical issues and damage to the pump.

Priming and Testing the Pump
Priming and testing the pump is the final step to ensure everything works correctly. Fill the pump with water to create the necessary suction for operation. After that, turn on the electrical supply and carefully observe the pump’s operation. Check for any leaks or unusual sounds that could indicate a problem. Ensure that the pump is circulating water smoothly, with no air pockets or blockages in the system. Adjust any valves if necessary to optimize water flow. Testing the pump thoroughly ensures that the installation is successful and that your pool pump is ready for regular use, helping maintain clean and clear water.
Common Mistakes to Avoid During Pool Pump Installation
When installing a pool pump, it's essential to avoid some common mistakes that can lead to operational issues. One of the most common errors is improper positioning of the pump, which can lead to vibrations and unnecessary wear. Another mistake is not securing the plumbing connections tightly enough, which can result in leaks and poor water flow. Incorrect wiring can also be a major issue, leading to electrical hazards or pump malfunction. Skipping the priming step can also cause the pump to run dry, which may result in overheating or damage. Additionally, using low-quality materials can compromise the overall performance and longevity of the pump.
Conclusion
Installing a pool pump is an important task that ensures your pool operates efficiently and stays clean. By following this detailed guide on how to install a pool pump, you can confidently complete the installation, avoiding common mistakes and ensuring long-lasting performance. Properly positioning the pump, connecting the plumbing securely, and wiring the system safely is essential for a successful installation. Priming and testing the pump will confirm that the system is working properly and ready for regular use. With these expert tips, you can ensure your pool pump is installed correctly, contributing to a well-maintained and clean pool for years to come.
FAQ:
How long does it take to install a pool pump?
The installation process typically takes about 4-6 hours, depending on your familiarity with the equipment and the complexity of your pool system. Proper preparation and having all the necessary tools on hand can streamline the process.
Can I install a pool pump myself, or should I hire a professional?
While it’s possible to install a pool pump yourself, ensure you’re comfortable with basic plumbing and electrical work. If you’re unsure at any step, hiring a professional can prevent potential issues and ensure a safe, efficient installation.
What maintenance is required after installing a pool pump?
Regular maintenance includes cleaning the pump’s strainer basket, checking for leaks, and ensuring proper water flow. Periodically inspect the pump and wiring for wear and tear. Keep the surrounding area clean and free from debris to prevent clogs and mechanical issues.
