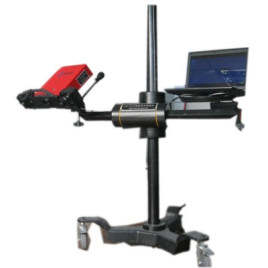
: The advantages of the JDSACN system compared with similar products:
Compared with the traditional Gray code plus phase shift method, the measurement accuracy is higher, and the single measurement range is larger (from 50mm Up to 3 meters), strong anti-interference ability, and less affected by the light and shade of the surface of the tested workpiece.
It is rare in the world to independently research and develop two sets of industrial photogrammetry system and three-dimensional optical scanning system at the same time, both of which have applied for patents. Powerful and fully independent software system. All program codes are written by R&D teams. Fully meet the requirements of customers.

Simple operation interface, one-key operation throughout the whole process, real-time display of public signs during the splicing process, true intelligent splicing, no third-party software for processing, one machine Multi-purpose, single measuring width from 50mm to 3 meters, can measure workpieces and objects from several millimeters to tens of meters.
One measuring system can scan and measure small, medium and large workpieces at the same time. The system is equipped with powerful post-processing functions, which can quickly, accurately and automatically complete the precise matching and fusion of multiple point clouds. The amount of point cloud data is small without loss of details. It can meet the different needs of reverse design and product online quality inspection. Fully automatic intelligent splicing, the precision is internationally leading, the splicing has no layering, and is equipped with a global error control system; it can also be used in conjunction with the JDSACN-PH industrial close-range photogrammetry system to complete the measurement of large objects with higher accuracy. Non-contact scanning, using advanced structured light coding technology to avoid contact with the surface of the object, can measure soft objects, without any impact on the operator and the measured object. The scanning speed is fast, and the measurement of a single format from 1200mm to 30MM can be completed in 4 seconds, and millions of scanning points can be obtained. The measurement point data is very regular, and the measurement data is basically free of noise. It has a wide range of adaptability and can measure all kinds of large, medium and small objects. The system integrates three large, medium and small measurement systems. It can measure objects as large as car bodies and passenger airplanes, as well as objects as small as coins. The specifications are not limited. Scanning point cloud density is adjustable: According to different measurement object requirements, the system can automatically adjust the point cloud density to obtain suitable point cloud data. It has low requirements for the measurement environment and can work in a normal indoor environment or in the field without a dark room. Large measuring range, measuring size range: 3mm~100m, rich data interface
Support ASC, IGES, OBJ, STL, VRML, DXF, MDL, SMF and other data formats, can be compatible with Pro/E, UG , Imageware, Geomagic, AutoCAD and other design software interfaces.
20. Long-term upgrade and technical support, fully independent research and development, to ensure the long-term upgrade and technical support of the system
